
Looking to brighten up your home or garden using clean energy? A DIY solar light circuit is an easy and rewarding project that lets you harness the power of the sun to create efficient, automatic lights. Whether you’re a beginner in electronics or an experienced maker, this guide will walk you through the complete process — from selecting components to wiring the circuit.
In this article by TechnicalTooMuch, you’ll learn:
- How a solar light circuit works
- The list of required components (with Amazon affiliate links)
- Step-by-step circuit design and working principle
- Tips for installation and testing
- Common troubleshooting methods
What Is a Solar Light Circuit?
A solar light circuit converts sunlight into electrical energy during the day using a solar panel. This energy is stored in a rechargeable battery and powers an LED light automatically when it gets dark.
The key idea is simple — charging during the day, lighting during the night — but understanding the circuit design helps you make your setup more reliable and efficient.
Working Principle
Here’s how the system works:
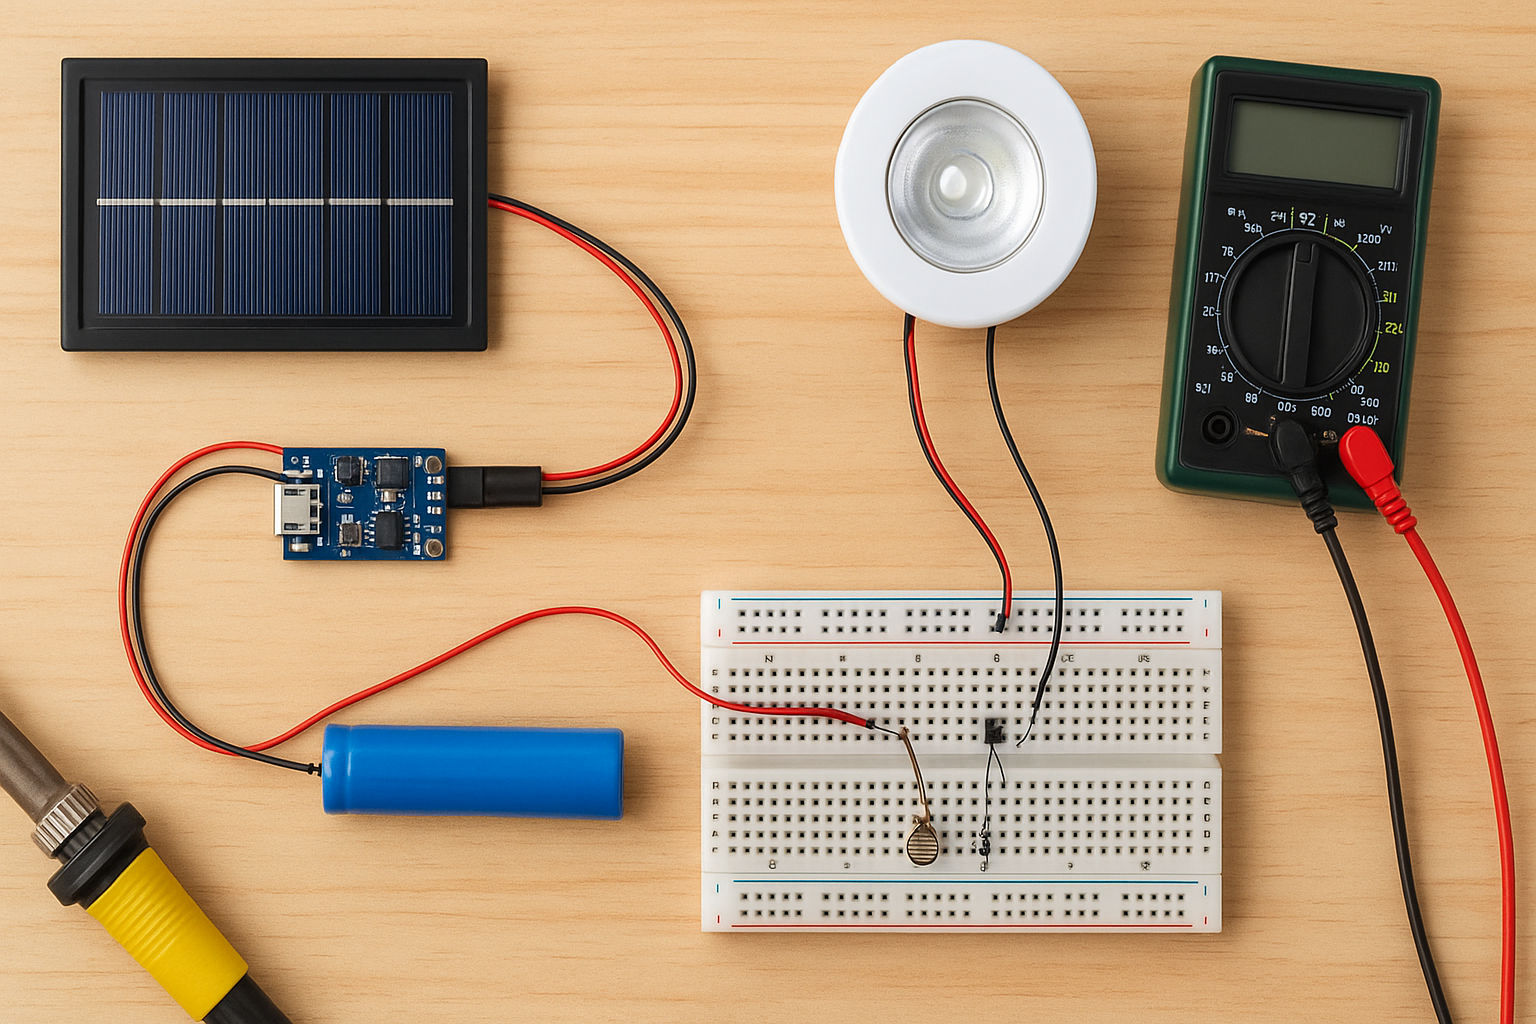
- Solar Panel: Converts sunlight into DC electricity.
- Charge Controller: Regulates voltage and prevents battery overcharging.
- Battery: Stores the energy for night use.
- Photoresistor (LDR): Detects darkness to turn on the LED automatically.
- LED Light: Provides illumination using stored battery power.
When sunlight falls on the solar panel, it charges the battery. As soon as it gets dark, the LDR triggers the LED light to turn on — providing automatic, renewable lighting without any human effort.
Required Components
")
Here’s the full list of parts you’ll need to build your DIY solar light circuit.
(All links below are Amazon affiliate links — you can earn a small commission at no extra cost to readers.)
| Component | Description | Amazon Link |
|---|---|---|
| Solar Panel (6V–9V) | Converts sunlight into DC electricity | Buy on Amazon |
| Rechargeable Battery (3.7V Li-ion) | Stores power generated by the panel | Buy on Amazon |
| TP4056 Charging Module | For safe charging of Li-ion batteries | Buy on Amazon |
| LDR Sensor | Detects light/dark for automatic switching | Buy on Amazon |
| LED Light (White 1W–3W) | Provides bright illumination | Buy on Amazon |
| Resistors (10kΩ, 220Ω) | Used for current control | Buy on Amazon |
| Transistor (BC547 or 2N2222) | Acts as a switch for LED control | Buy on Amazon |
| Diode (1N4007) | Prevents reverse current | Buy on Amazon |
| Wires and Breadboard | For circuit connections | Buy on Amazon |
Tip: You can learn more about these components in our guide — DIY Electronics Tools
DIY Solar Light Circuit Diagram
Below is a simplified circuit overview:
")
[Solar Panel] → [Diode] → [Battery] → [Transistor + LDR] → [LED Light]
During the day, the diode allows current to charge the battery but blocks reverse flow at night. The LDR detects when light levels drop and activates the transistor, turning on the LED.
If you’re new to breadboard wiring, check our beginner tutorial —
What is a Breadboard and How to Use It?
Step-by-Step: How to Build the Circuit
Step 1: Connect the Solar Panel
- Connect the positive terminal of the solar panel to the diode’s anode.
- The cathode of the diode connects to the battery’s positive terminal.
- This ensures one-way charging and prevents current leakage at night.
Step 2: Add the Battery and TP4056 Module
- Use a TP4056 module for controlled charging.
- Connect the solar panel output to the module’s input and the battery to the output pins (B+ and B–).
Step 3: LDR and Transistor Setup
- Connect one leg of the LDR to Vcc and the other to a 10kΩ resistor leading to the transistor’s base.
- The transistor acts as a switch to control the LED based on the light intensity.
Step 4: Connect the LED
- Attach the LED’s anode to the transistor’s collector and cathode to the battery’s negative terminal.
- When it gets dark, the LDR resistance increases, turning the transistor ON and powering the LED.
Step 5: Testing
- Expose the LDR to light — the LED should turn OFF.
- Cover the LDR — the LED should turn ON.
- If it works, mount the circuit on a PCB for permanent installation.
Installation in Home and Garden
- Place the solar panel where it receives at least 6 hours of sunlight daily.
- Use a transparent waterproof box to protect the electronics.
- Install multiple units along pathways, garden edges, or walls.
- For longer backup, use a larger battery (2000mAh–3000mAh).
- For brighter output, use 3W LEDs with heat sinks.
Tools You’ll Need
If you’re a DIY enthusiast, these tools make assembly easier:
- Soldering Iron Kit – Buy on Amazon
- Multimeter – Buy on Amazon
- Wire Cutter and Stripper – Buy on Amazon
You can read more about them here:
👉 Essential Tools for DIY Projects
Benefits of DIY Solar Lights
- Eco-Friendly: Uses renewable solar energy.
- Cost-Effective: Low installation and zero running cost.
- Automatic Operation: LDR-based night detection.
- Scalable: Add more units easily.
- Educational: Great for electronics learners and students.
For more student-friendly ideas, check our post —
👉 Top 10 DIY Sensor-Based Projects for Students
Troubleshooting Tips
| Problem | Possible Cause | Solution |
|---|---|---|
| LED not turning ON | LDR not connected properly | Check LDR polarity and connections |
| Battery not charging | Faulty solar panel or diode | Test voltage from solar panel |
| LED always ON | Wrong transistor configuration | Swap base/emitter pins |
| Weak light | Low battery voltage | Fully charge the battery |
Upgrades and Improvements
You can enhance your circuit with additional features:
- Use a MOSFET instead of a transistor for higher current handling.
- Add a microcontroller (like ESP32) for smart control or IoT monitoring — check our article 👉 10 Easy Arduino Projects You Can Build at Home
- Include a PIR motion sensor to save power by turning ON the light only when movement is detected.
Real-Life Applications
- Pathway and garden lighting
- Balcony or terrace décor
- Streetlight prototypes
- Emergency backup lights
- Educational electronics project for students
Conclusion
Building your own DIY solar light circuit is not only fun but also contributes to a cleaner environment. Using basic electronic parts, you can create an automatic, low-cost, and sustainable lighting solution for your home or garden.
Experiment with different LED types, battery capacities, and sensors to enhance your design — and remember, every project you build sharpens your DIY skills.
If you thought build Rechargeable LED Light at home – How to Make a DIY Rechargeable LED Light at Home