
Wireless LED light projects are one of the most exciting and beginner-friendly DIY experiments you can build at home. With just a few simple components, you can make an LED glow without any wires, using the power of electromagnetic induction—just like modern wireless chargers. This project is perfect for students, hobbyists, and anyone who wants to learn practical electronics while creating something useful and impressive. In this step-by-step guide, you’ll learn exactly how to make a wireless LED light at home, what components you need, how the circuit works, and how to get the best brightness and range. Let’s start building your very own wireless lighting system!
What Is a Wireless LED Light?
A wireless LED light is a simple system where the LED glows without wires, using a small transmitter and receiver coil. This concept is based on electromagnetic induction, just like wireless chargers.
You only need a few tools and basic components to build it at home.
Components You Need
Below are the components required.
- Copper Wire (32–36 AWG) — [Amazon]
- 27k Resistor — [Amazon]
- LED (any color) — [Amazon]
- NPN Transistor (2N2222 or BC547) — [Amazon]
- 9V Battery — [Amazon]
- Soldering Iron — [Amazon]
👉 Read: “Essential Tools for DIY Electronics Projects”
How Does This Wireless LED System Work?
The working principle uses magnetic resonance induction:
Transmitter Side
- A copper coil + transistor circuit creates an oscillating magnetic field.
- This field spreads around the transmitter coil.
Receiver Side
- A similar coil picks up this magnetic field.
- The induced voltage powers the LED wirelessly.
This method is safe, energy-efficient, and perfect for small DIY experiments.
Step-by-Step Guide: How to Make a Wireless LED Light
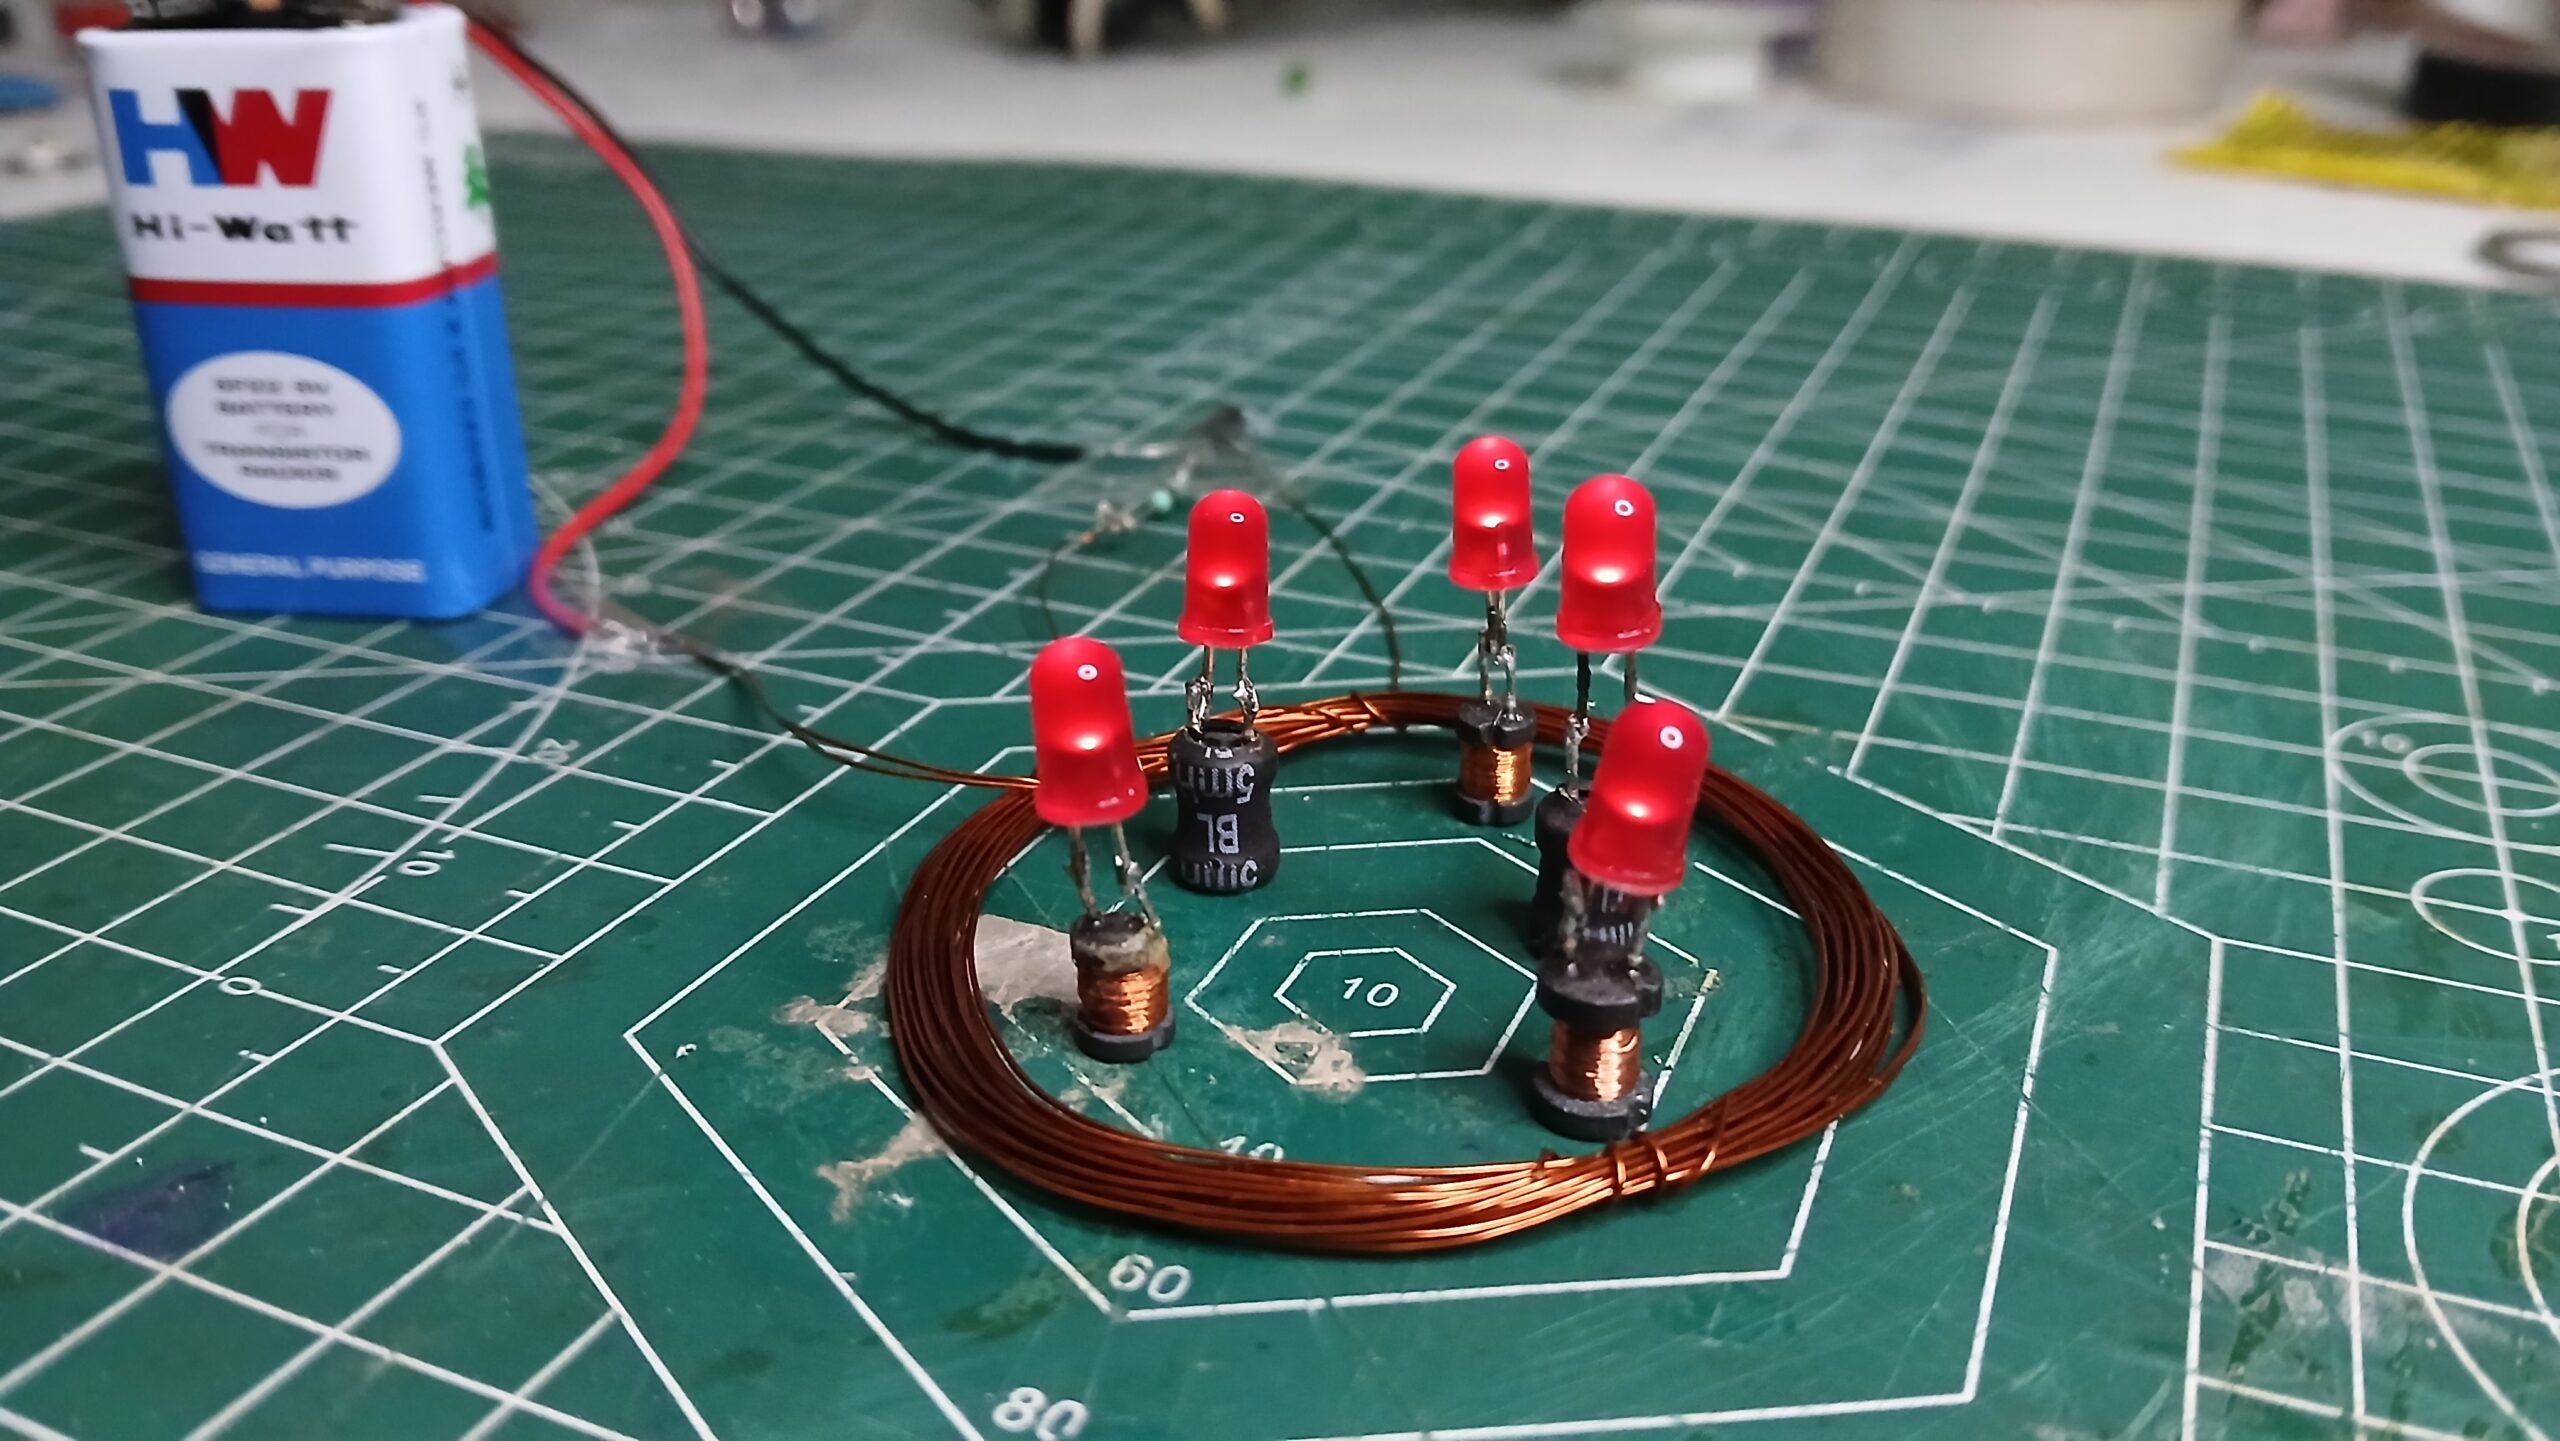
Step 1: Make the Transmitter Coil
- Take a Bottle or a Glass.
- Roll 15 turns + Loop + 15 turns of copper wire tightly.
- Secure both ends.
Step 2: Build the Transmitter Circuit
Connect the circuit:
- Coil one end → transistor collector
- Coil Loop → positive of 9V battery
- Transistor base → 27k resistor + Coil other end
- Transistor emitter → battery negative
")
Step 3: Make the Receiver Coil
- Take another 25–30 turns of copper wire.
- Connect its ends to:
- LED
- No power supply needed here.
or
")
- Take a old 9w led bulb
- Open the bulb circuit
- And desoldering the Coil inductor. then connect the inductor to led.
👉 Read: “Top 10 DIY Sensor Projects for Students”
Step 4: Testing the Wireless LED Light
- Place receiver coil near the transmitter coil.
- Power the transmitter with a 9V battery.
- The LED will light up wirelessly if coils are aligned correctly.
")
If it doesn’t glow:
- Keep coils closer
- Increase the number of turns
- Reverse LED polarity
Tips for Best Range & Brightness
- Increase transmitter coil turns for stronger magnetic field
- Use high-quality copper wire
- Keep coils parallel
- Use fresh 9V battery
- Use ferrite core for greater efficiency
Applications of Wireless LED Light
- Mini wireless lamps
- School science projects
- Electronics hobby projects
- Wireless charging demo
- Decorative wireless lights
👉 Related: “DIY Solar Light Circuit for Home & Garden”
Troubleshooting Guide
LED not glowing?
- Move receiver coil closer
- Increase coil turns
- Replace transistor
- Check diode direction
Low brightness?
- Use thinner wire
- Use higher battery voltage
- Improve coil alignment
Conclusion
Making a wireless LED light at home is an easy and exciting DIY project that anyone can try. With just a few basic components and simple steps, you can create a fully working wireless lighting system that works through electromagnetic induction. This project not only helps you understand the concept of wireless power transfer but also improves your electronics skills. Try this project today and experiment with coil distance, turns, and alignment to get the best brightness and range. Happy DIY building!
👉 Read: “How to Make a DIY Rechargeable LED Light at Home 4 step(step-by-step guide)”